
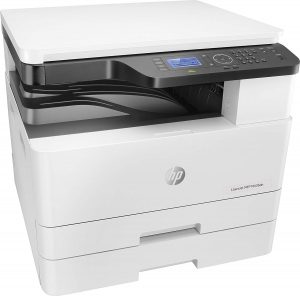
123.hp.com/ljm436dn - HP LaserJet M436dn
You will get all the assistance from us regarding the 123.hp.com/ljM436dn printer. We will also provide you additional information about 123 HP Laserjet M436dn initial setup, 123 HP Laserjet M436dn driver download, 123 HP Laserjet M436dn driver installation process and 123 HP Laserjet M436dn wireless setup methods.
- 123 HP Laserjet M436dn Initial Printer Setup
- 123 HP Laserjet M436dn Driver Software Setup
- 123 HP Laserjet M436dn Support and Userguide
- 123 HP Laserjet M436dn Cloud Print
To solve all the issues regarding your 123 HP Laserjet M436dn printer, our skilled technicians are here for you all the time.
123 HP Laserjet M436dn Initial Printer Setup
After buying the printer you need to perform the basic setup for the device. The steps to set up your printer for the first time are here as follows.
- Remove the packaging materials from the device including all the stickers and tapes. Then open the scanner lid and you will see a covering with blue tapes are attached to the glass. Remove all of them and close the lid.
- Open the front-end door and you will find a packet full of utility items like screws and bolts. After taking out the packets, close the front door.
- After that, you need to open the right door, unwrap and remove the tape which is used for shipping purposes from the front and back end of the rollers. Then remove the tape.
- Unwrap the toner cartridge from the packet and shake it well upwards and downwards so that the toner can spread in the cartridge.
- Pull orange or red material from the toner cartridge and remove it. Align the toner cartridge in the device and push it inside. Make sure that you have placed the toner in the correct slot.
- To load paper in the printer, pull out the input tray and try to adjust the width-guide which is green in color. Now set and adjust the length and make room for the papers which you have to place in it.
- Set a bunch of paper in the tray and you can lift or push down the lift-plate according to your needs. Don’t fill the tray with too many papers as the tray might become heavy and then you may have to face issues like paper jams.
- Observe the “MAX” icon which is given there and maintain the icon to level up your paper quantity.
- Then, close the tray and power on your printer by plugging the power cord to the printer and electric socket. Tap on the power button to turn on the device.
Follow all the above methods to complete the primary installation procedure. Download and install all the drivers to proceed further.
123 HP Laserjet M436dn Driver Software Setup
After the successful completion of the initial setup, you need to install the drivers for further enhancement of your printer. The drivers are easily available at 123.hp.com/hp-color-laserjet-M436dn webpage. Just go to the web page and click on the www.123hp-com/hp-laserjet-pro-M436dn-driver-download/ and that particular page will redirect you to the downloads page.
123 HP Laserjet M436dn Support and Userguide
In the setup processes for support and user guide, all the sections are given below in detail.
ePrint Setup for HP Printer
The ePrint feature is a freeware mobile printing service that allows you to print from any part of the world. Using the printer’s email id, you have to send the printing jobs to it. You need not download any driver software for using the ePrint. With the help of 123.hp.com/setup, you need to install the Web Services form the printer device for mobile printing services. The Web Service feature will help you in managing the list of printing tasks, see the status of the printer, and control user access. To enable Web Services, you must follow the points that are given below.
- Go to the printer device and tap on the ePrint button which is present in the printer control panel.
- you need to agree and accept the terms and conditions that are given there.
- For enabling the web services, follow the on-screen instructions of 123.hp.com/setup.
- After that, publish a test page by printing it from your printer.
If you don’t know the email id of your printer, follow the steps which are given below.
- Once again, press the ePrint button.
- Go to the Web Service Settings menu and click on Display Email Address.
For customizing the email address of your 123.hp.com/setup follows the below-mentioned steps.
- Open the printer Control Panel and select the Web Services Settings option.
- Select the Print Info Page, which will print an information page consists of various types of codes regarding the printer and instructions.
- If you wish to turn off the ePrint feature, then go to the Web Services menu and select the ePrint feature and turn it Off.
Airprint Setup
Airprint is a mobile printing platform as well as a solution that is perfectly compatible with Apple iOS and Macintosh devices. You will be able to accomplish the printing task from your iPhone, iPod and iPad devices to any HP laserjet printer.
List of Apple Devices Compatible with Airprint
The list of Apple devices that are compatible with Airprint is as follows.
- The Apple devices that you are using must have the Airprint application installed in it.
- Macintosh OS X version 1.07.
- Your iOS device must run in 4.2 version.
- The iPhone that you are using must be 3GS.
- If you have an iPad, then it must belong to the third generation.
List of Compatible Applications for iOS devices in Airprint
The compatible applications are Mail, photos, PDFs, SAFARI and any other secure third-party applications.
Firmware Availability for Airprint Application
To check the firmware which is available for the Airprint application just click on the Installed Personalities option and check if the application is under the list. If yes, then skip the current process and establish a connection to the Apple device with the same wireless network just like the printer.
In case if your printer doesn’t recognize the Airprint printing application, you must update your printer’s firmware to make it recognize once again.
123 HP Laserjet M436dn Cloud Print
Cloud Print is from Google which is also a printing solution that allows you to print documents from any wireless network devices. In this platform, you also don’t have to download or install any drivers for running the Google Cloud Print Application.
If you want to start the Google Cloud Print Service, then you need to follow the instructions which are given below.
- First, you need to check that your computer runs in normal web browsers and operating systems like Windows XP or higher, Linux, or any other latest operating system.
- An active Google Account is a mandatory item.
- Be sure that the printer is active in the same network in which the computer and printer are active.
- Turn on your printer device and log in to the Google account with Google Chrome Web browser. Then click on the Show Advanced Settings which is the Settings dialog box.
- Then, press the Manage icon and select the Google Cloud Print feature.
- You can register your printer device under the section of New devices where the printer will be present in the list.
- On the other hand, you might also register the device under the section of My Devices. There you just have to choose the Manage option.
In order to print any documents, just open your Google Chrome browser and click on the Print icon to print the files. Before that select the particular document that you need to print and upload it to the Google Cloud Print. Then open the same document there and print it with the help of print command.