
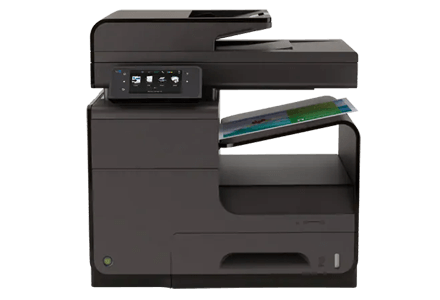
123.hp.com/ojprox576 - HP Officejet Pro x576
We provide support for the 123.hp.com/ojprox576 printer setup, 123 HP Officejet Pro x576 printer driver download, 123 HP Officejet Pro x576 printer driver installation, and 123 HP Officejet Pro x576 printer wireless setup. All our experts have enough knowledge and skill to fix any and every problem with each and every HP printer model with efficiency. Here, we will discuss these:
- 123 HP Officejet Pro x576 Initial Printer Setup
- 123 HP Officejet Pro x576 Driver Installation
- 123 HP Officejet Pro x576 Wireless Printer Setup Process
- 123 HP Officejet Pro x576 Wireless Mobile Printing
- 123 HP Officejet Pro x576 AirPrint
- 123 HP Officejet Pro x576 Cloud Print
- 123 HP Officejet Pro x576 ePrint
Initial Setup Process for the HP Officejet Pro x576 Printer
First, we will guide you about the initial setup process of the HP Officejet Pro x576 printer. The steps are mentioned below.
- First, place the box of the printer at an even place and then open it. After that, take out the device from the box and remove all the wrapping and protective materials from it.
- Next, open the front or top lid of the HP printer to reveal the internal components of the device and carefully remove any tapes present on the rollers and anywhere else.
- Now, take out the power wire from the box and connect one end of the plug to the wall socket and the other end to the printer and next, tap the switch for charging the device.
- Now, go to the device and press the ‘Power’ button. Once again pull up the top or front panel of the printer and remove the ink cartridges from the package box.
- After you have taken out all the cartridges, remove the wrapper off from them. Now, shake all the ink cartridges one after another and install them into their correct slots.
- Once the installation of the ink cartridge into the HP Officejet Pro x576 printer is successfully complete, next, close the top access door of the printer.
- Now, open the paper input tray of the HP printer, put a bunch of paper and slide them down with a slider to align the papers properly. After the alignment of the paper bunch, close the paper input tray.
Driver Installation Process of the 123 HP Officejet Pro x576
Now it’s time to install the driver of the HP Officejet Pro x576 printer. Follow these steps:
- First, you need to visit the official 123.hp.com/ojprox576 website. On that website, go to the ‘Software and downloads’ section, enter the model number of the printer into the correct field and click on the ‘Begin’ button.
- Once the search results page comes up, next, locate and click on the ‘HP Officejet Pro x576 driver download’ link. Now, if you see the ‘Save’, ‘Open’ or ‘Run’ button at the bottom of the browser, then click on it.
- This action will initiate the download process of the setup files for the printer driver. Once the download procedure is over, next, locate the setup file and double-click on it.
- As soon as you do that, a new installer window will come up, in it, follow the instructions that come up on the screen and accordingly click the Install button.
- Next, wait for the installation process of the driver to get over.
- Finally, once the installation of the driver is complete, visit the 123.hp.com/ojprox576 website and attempt to complete the registration and activation of the HP printer.
Wireless Setup Process of 123 HP Officejet Pro x576 Printer
Setting up the HP Officejet Pro x576 printer wirelessly can be done in many ways and we have mentioned them in detail below.
Wireless Setup Process of the HP Officejet Pro x576 Printer for Windows
The steps to wirelessly set up the HP Officejet Pro x576 printer for the Windows computer are as follows:
- First, tap on the combination of ‘Windows + S’ keys to launch the default search section of the OS.
- Now, within that section, type in “control panel” and then from the search output, locate and choose the ‘Control Panel’ option.
- As soon as you click on that option, a new window having the name ‘Control Panel’ will come up. Inside that window, there will be multiple categories of computer settings that you can change at your will.
- Out of all those settings categories, find and choose the one that says ‘Hardware and Sound’. This action will open a new page, in it, select the ‘Devices and Printers’ option.
- Another new page will come up next, in it, go to the menu bar and click on the ‘Add a device’ button.
- Now, power on the HP Officejet Pro x576 printer and choose the ‘Wireless’ button on the control panel. After that, from the screen, select the ‘Wireless Setup Wizard’ option.
- Then, click on either the ‘OK’ or ‘Next’ button to go on with the setup process.
- Now, the 123 HP Officejet Pro x576 device will look for any network present in the vicinity of the printer and present them on a list.
- Next, from that list, find the network with which the computer is connected and select it. If you get a prompt to enter the user credentials, then provide the ‘Username’ and ‘Password’ and click ‘OK’.
- Now, from the computer, choose the ‘Add a network, wireless or Bluetooth printer’ link from the ‘Add Printer’ dialog box. As soon as you click on that link, a new page will appear.
- Inside that page, choose the HP Officejet Pro x576 printer from the list and then click on the ‘Next’ button to finish the setup process.
- At last, print a document to check if the printer is working fine or not.
Setup the HP Officejet Pro x576 Wirelessly for Mac Computer
The wireless setup procedure of the HP Officejet Pro x576 printer for a Mac computer is provided below.
- First, choose the correct wireless network from the printer control panel. If you get a prompt to enter details like ‘Username’ and ‘Password’, then put them on their respective fields and connect the device to that network.
- If the printer came with a software CD, then install the correct driver of the device into the Mac computer, otherwise, visit the official 123.hp.com/ojprox576 website, download and install the proper driver into the machine.
- Once the installation is over, next, locate the ‘Dock’ section at the bottom of the desktop. Now, from that section, find and click on the ‘System Preferences’ icon.
- As soon as you click on that icon, a new window having the name ‘System Preferences’ will come up, in it, locate and choose the ‘Hardware’ section.
- Under that section, choose the ‘Print & Fax’ option. This action will launch a new window with the name ‘Print & Fax’.
- Inside that window, go to the left pane and then choose the ‘+’ button from the bottom of the list.
- Once you choose the ‘+’ button, next, a new dialog box with a heading ‘Add’ will come up.
- Inside that dialog box, go to the top menu bar and choose the ‘IP’ tab. Under that tab, select the ‘Internet Protocol IPP’ item from the drop-down list for the ‘Protocol’ field.
- After that, enter the HP Officejet Pro x576 printer’s IP address and its queue name.
- Next, go to the ‘Print Using’ field and click the drop-down menu to choose the right printer driver.
- At last, tap on the ‘Add’ button to complete the wireless setup of the HP Officejet Pro x576 printer. Then, print a document to check if the device is working correctly or not.
123 HP Officejet Pro x576 Printer Wireless Setup Using a USB Cable
To set up the HP Officejet Pro x576 printer device wirelessly via the USB cable, follow the steps below.
- First, close all the applications that are currently open on the computer.
- Now, take out the software CD that came with the HP printer and insert it into the computer CD drive.
- Now, locate the specific application from the software CD and follow the instructions that come up on the screen and install the application accordingly.
- When you get a prompt from the installer window during the installation process, choose the ‘USB-Connect the printer to the computer using a USB cable’ option. After that, choose the ‘Next’ button.
- If you get a prompt that warns that the ‘Web Services like ‘HP ePrint’ and ‘print Apps’ will not be available with the USB installation, choose the ‘Yes’ button to complete the USB installation process.
- Once you get a prompt to connect the USB cable between the computer and the printer, do it properly.
- Finally, wait for the installation process to complete. Once this procedure is over, next, print a document to check whether the device is working perfectly or not.
Setup the HP Officejet Pro x576 Printer Using Auto Wireless Connect
To set up the HP Officejet Pro x576 printer using the Auto Wireless Connect feature, follow the steps below.
- First, make sure that both the network and the computer are compatible. In order to check that go through the requirements below.
- The computer should run Windows Vista and OS X 10.5 or later for PC and Macintosh respectively.
- Also, the computer should be connected to the wireless router with 802.11 b/g/n protocol via a 2.4GHz connection.
- The Operating System of the computer should be in control of the wireless network.
- The PC must utilize a dynamic IP address and not a static one.
- Now, open the web browser and visit the 123.hp.com/ojprox576 website. Inside that website go to the search section. Next, type in the model number of the HP printer and click on the ‘Find’ button.
- As soon as you click on that button, a search output comes up. From that search output, locate the software for the HP Officejet Pro x576 printer and click on the ‘Download’ option.
- If there is any other software installed within the computer, remove it. Once the download of the new printer software is complete, next, run it. Then, follow the instructions that come up on the screen and install the same.
- Now, power on the printer.
- When the printer is powered up, next, follow the on-screen information until the ‘Network’ section comes up.
- Next, inside that section, go to the center of the page and choose the ‘Network (Ethernet/Wireless) button.
- Once the ‘Device Network Connection’ page comes up, next, tap on ‘Yes, send my wireless settings to the printer’. This action will find the device and then send the details of the wireless network over to the printer.
- Now, wait for the HP Officejet Pro x576 printer to connect. As soon as the connection is complete, you will see a confirmation message.
- Lastly, complete the setup process of the Auto Wireless Connect feature and attempt to print a document.
Wireless Mobile Printing of the 123 HP Officejet Pro x576
To perform wireless mobile printing with the HP Officejet Pro x576 printer you can follow the methods mentioned below.
Print with 123 HP Officejet Pro x576 Printer using AirPrint
Airprint is the feature used exclusively by all the Apple handheld devices to print a document. Using this feature, one can easily print anything wirelessly from any type of iOS devices like the iPhone, iPad, and iPod. In order to use this feature, you will have to read the user manual of the HP Officejet Pro x576 printer.
Use Cloud Print to Print via 123 HP Officejet Pro x576 Printer
Cloud Print is a web-based service to print files from all internet-enabled devices such as smartphones and tablets. In order to use this service, you will have to register the HP Officejet Pro x576 printer on the ‘Google Cloud Print’. Once the registration of the device is complete, next, you can simply change the settings with the help of an option called ‘Manage’.
Utilize the 123 HP Officejet Pro x576 Printer to Print Something via ePrint
The ePrint is a Cloud service specifically made for the HP printers. This feature allows you to assign any print jobs from anyplace through a reliable internet connection. It allows users to send print jobs through an email from internet-enabled devices like computers, tablets, smartphones to the printer’s own email address.